How to Make & Grill (or Pan Fry) a Perfect Burger

Today’s post comes in light of the Persian Burger recipe that I posted last week. I thought I would share a couple of fascinating and truly helpful tricks that I learned while doing research on how to prepare burgers in light of the Great Burger Challenge.
I have to confess that burgers were not my thing until recent years. A somewhat thin mediocre tasting patty of meat topped with tomatoes, onions, lettuce, and sometimes cheese didn’t particularly rock my foodie boat. Then, and some might laugh at this, one day I deviated from my usual and beloved SandPiper Sandwich at Islands Restaurant and got a burger, specifically the Hula Burger. Oh my! Now that rocked my taste buds!
Fast forward a few years and now gourmet burgers have become super popular. In fact so popular that last year’s September publication of Saveur Magazine was a special issue dedicated to burgers. The whole feature was rightfully named The Burger Bible, they pretty much covered every single step in making a burger: buns, meat, sauces, toppings, cooking techniques, and best burger joints!
I think that there is nothing more delicious than a homemade burger. It is up to you what type of meat to choose or what to add to your patty. But if you follow the techniques featured here, you will have yourself one hell of a burger!

One thing that I found when doing research was that a perfect patty for me was one that was made it of good quality ground beef, 85% lean, and weighted somewhere between 7 and 8 ounces.

For those of you who work with metric measurements, that’s around 210 grams. To keep my patty consistent in weight I wrapped my food scale with plastic wrap then measured each patty.
Also, make sure that your patties are all even all across to ensure even cooking.

This is an awesome trick that I learned from Saveur Magazine’s “Making the Perfect Patty” article: “Thick burger patties tend to puff up in the middle while they cook. Making a depression in the top of the patty using the back of a measuring spoon, or just your thumb, helps a burger hold its shape.”
This is a great technique. My patties in the past used to rise and turn into meatballs. Not anymore!!!

Kinda annoying when you are working and taking pictures and someone comes in the kitchen and intrudes into your photo frame. Then they ask when will lunch be ready….to which I want to say “Vaghteh goleh nay!”

Anyway, the point is to make a depression so that the patty holds it’s shape and a tablespoon measuring spoon is perfect for this task.

Turn on your grill then close the cover to allow for the grill to get hot.

When the internal temperature of your grill reaches 400° it is ready for some grillin’!

It’s very important to clean your grill before you start cooking in order to get rid of any left over food from previous grilling adventures. I wrote a great “How To” post last year on how to clean your grill properly: Tips & Techniques: How To Clean Your Grill

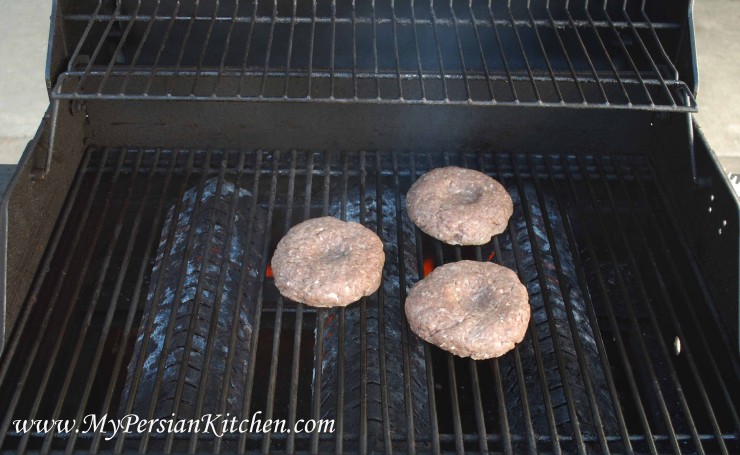
When using leaner meats such as I did, it is best to spray your grill with oil or rub some oil on it to prevent the meat from sticking. Carefully pick up patties with a flat spatula and place them on the grill with the depression facing up. For added flavor you can add a bit of salt to your patties prior to putting them on the grill.

You will notice that the depression in the middle of the patties will become smaller as the meat expands. However, the patty will hold its shape. Some of the juices will also collect in the cavity. Leave you patty alone and let it do its thing. Allow the patty to cook for about 5 minutes.

Carefully flip your patties. Cook for another 2-3 minutes. One important element in cooking a burger is to cook it on the first side down the majority of time. Once you flip it, it should cook for a very short time. Additionally, just flip your patties only once.

At no point during the grilling time put your flat spatula on the burger and press it down. That’s a huge huge no no I found out! I used to be so guilty of this specifically because my patties would turn into meatballs. By pressing down the patty all the juices will be released from the meat leaving your burger dry. I don’t know about you, but I am all about juicy burgers!!!
The idea here is to leave the patty alone so it can cook to your desired temperature.

If you don’t have a grill, patties can also be pan fried easily. It will be super juicy this way as well. Make sure that the pan is nice and hot when the patties go in. The rules are exactly the same. Make a depression on the patties, place a small amount of oil in the pan when using lean meat, cook longer on the first side than the second side, and finally, never press down on the patties.

Once done assemble your burger and enjoy!
Here are some worth while reads from Saveur Magazine’s The Burger Bible issue on how to make delicious burgers:


October 4, 2010
Hi! Love your blog. I recently attended a Persian cooking presentation and got very interested in Persian cuisine. I will be trying out some of your recipes soon. I really like how you have broken down the steps to cooking a perfect burger. I am guilty of pressing down on the patty and flipping the burger more than once in the past. Next time I try making burgers I am definitely using your techniques. Thanks.
October 4, 2010
Oh my gosh, I have become such a fan of this site in no time flat!
It all started about a month ago when I was looking for a recipe for kuku, which I originally thought was an Armenian recipe. It was something my mother used to make during the holidays. I’m Armenian, so I just assumed it was an Armenian dish. Tsk, tsk, tsk!
Come to find out, most of the dishes I’ve enjoyed while growing up are actually Persian.
Anyway, I have dived in to your site head first; read everything you’ve ever posted about, and find myself coming back for more!
Thanks for clearing things up, and providing such a wonderful source for the foods I find myself craving desperately.
Ironic that I would declare my love for your blog on a post pertaining to BURGERS! LOL